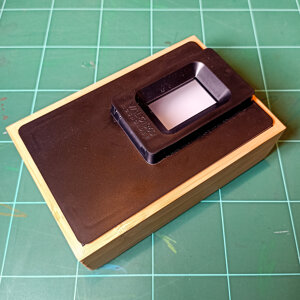
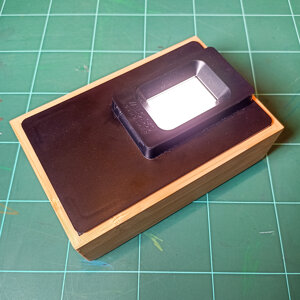
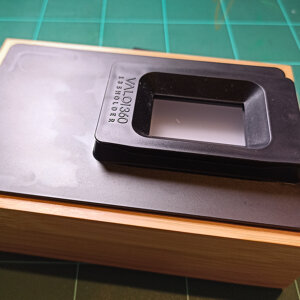
tomkyle’s DIY lightbox for camera-scanning
Digitizing film negatives with a digital camera is a fairly young discipline. Although more and more sublime and stylish commercial products gain their share, it still is strongly influenced by improvisation and tinkering. Here I describe a DIY lightbox for digitizing film with a DSLR. It is easy to build and combines affordable and highly efficient components in a compact and handsome setup.
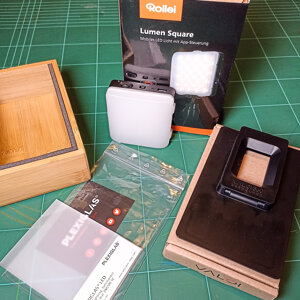
This article tells a bit about the components used, and also provides some background facts and basic knowledge about scanning 135 film with a digital camera. My digitizing lightbox consists of five components:
Table of contents
- Film holder
Valoi 35mm holder for its simplicity and style - Wooden box
as housing for light source and stray light mask - Light source
Rollei Lumen Square is powerful and efficient - Diffuser
Plexiglas LED 0M200 SC for its enormeous transmission - Light chamber
made from foamboard
Film holder: Valoi 35mm holder
When digitizing film with a DSLR, a film negative holder serves two functions: Leaving the back side open for backlighting while holding the negatives flat. Right when I first saw the early bird offers for the newly introduced film holders of the modular Valoi 360 series, I sniped the 35mm film holder for a sympathetic 39 €.
The film holder mainly consists of a base plate with dimensions 141 × 89 mm. Viewed from above in landscape format, the actual film window unit sits in on the right side. The base plate is carried by four “feet” (4mm height). They are, on three sides, offset 6mm from the edge and ~1.5mm on the side under the film holder unit.
So if you like to insert the film holder into another carrier plate (e.g. a box lid), this support plate needs a “mounting window” of 134 × 78mm the film holder comfortably fits in. The film holders edge offset will then cover the mounting windows edges.
- Outer dimensions
- 141 × 89 mm
- Feet offset
- 6mm on three sides | 1.5mm under film window.
- Mounting window (feet to feet)
- 134 × 78 mm
- Feet height
- max. 4mm
Wooden Box
Most photographers beginning with camera-scanning start off with a light tablet or large video light. Due to their size, these devices emit a lot of light where it actually is not needed, so they must be masked off. My approach is to enclose a small light source in a box on which the film holder can work as a lid. So after the film holder had arrived, I looked for a box with dimensions not smaller and not much bigger than the Valoi 35mm film holder (~14 × 9 cm). It was important to me that the box not be much larger, because a larger box would require a support plate as a box lid. Because I only had lightweight foam boards (Kapa-Fix, Kapa-Line) on hand, my fear was that during digitizing any pressure from above on the foam boards could ruin the focussing.
There are hundreds of wooden boxes on Ebay, Amazon, and such. The box I came up with is called WENKO Bambus Ablage Terra S from WENKO’s Bamboo Terra boxes series and is available on Ebay (ca. 11€ incl. postage) and via the Wenko Online Shop (ca. 6€ excl. postage).
From the outer box dimensions (15 × 10 × 4.8 cm) the wall thickness (6mm) must be subtracted. The film holders feet must fit inside the inner dimensions. So the full data set for the WENKO box is:
- Outer dimensions
- 150 × 100 × 48 mm
- Wall thickness
- 6mm
- Inner dimensions
- 138 × 88 × 43 mm
Light source: Rollei Lumen Square
Many different light sources for film negatives have been discussed in interest groups such as “Digitizing film with a digital camera” over on Facebook or in Valoi’s Gear Guide on Light Sources. Key features mentioned most are number of LEDs, quality of color rendition (CRI value of at least 95), color temperature (preferably 5500 K), and input power (as indicator for output power, measured in Watt)
Often overlooked: how many lumens actually serve for camera-scanning?
Another key feature I often find overlooked is illuminance. It is, put simply, the density of light that falls on a certain area: When there is a known number of LEDs on a device with known dimensions, how many of them illuminate the actual negative frame? If the lights “power” (technical term: Luminous flux) is expressed in Lumen, how many of these lumens actually backlight a negative frame? “Lumens per area, as sent off the light source”, is called luminous exitance. It proves advantageous if the area of the light source is not much larger than the illuminated negative. This is why I looked for a small light source. I found the Rollei Lumen Square to be compact and powerful, here compared with the well-known Nanguang Video Light:
Rollei Lumen Square
The Rollei Lumen Square has 64 LEDs on a 46.3 cm2 (68 × 68mm) and thus uses nearly 19% of its advertised 604 lm for digitizing a single 135 frame. That is 114 lm per 135 frame! This is so strong, that it enables me to digitize a BW negative with 1/160 sec when spot-metered on a blank frame with ETTR applied. And it comes at a very pleasant price.
Nanguang Video Light CN-T96
The 96 LEDs of the quite often recommendend Nanguang Video Light CN-T96, also used in the famous Skier Sunray Copy Box II (now replaced by its decessor, Copy Box III), illuminate an area of 205 cm2 (174 × 118mm, without device borders). Compare that area with the 8.6 cm2 of a 135 negative (36 × 24mm) – only 4% of the Nanguang CN-T96’s overall power of 1672 lumen (as advertised) can serve for digitizing. That is 70 lm per 135 frame.
Rollei Lumen Square is cable-less
The device provides 32 yellow and 32 blue LEDs. Color temperature and overall power can be adjusted not only by a switch on the device, but also via Bluetooth connection and the Rollei Lumen app. OK, for our purposes, “always 100% and 5500K” is just plenty. Be warned, do not look directly into that light – you’ll see blue dots everywhere for 20 minutes. The Lumen Square is accu-driven and can be loaded via USB, so no cables are hanging around.
| Nikon D5500 · ISO 100 · F8 | Color films | BW films |
|---|---|---|
| Spot meter | 1/640 sec | 1/1250 sec |
| ETTR, that is overexposed +3 EV | 1/80 sec | 1/160 sec |
| Nanguang CN-T96 | Rollei Lumen Square | |
|---|---|---|
| Number of LEDs | 96 | 64 |
| Illuminated area | 174 × 118mm = 205 cm2 |
68 × 68mm = 46 cm2 |
| Advertised Luminous flux | 1672 lm | 604 lm |
| Usable luminous exitance | 70 lm / neg frame | 114 lm / neg frame |
Diffuser: Plexiglas 0M 200 SC
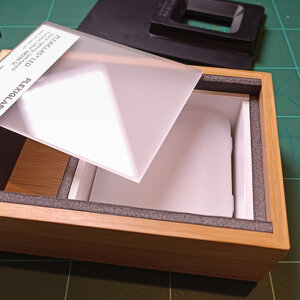
Now that we have a box and a light source and a film holder – isn’t that enough for digitizing? Sorry, not quite. The light source must be diffused, even if it brings its own diffuser. The reason for this is the extremely short distance between the light source and the negative; the danger is that the outlines of the individual LED lights will still be visible on the negative.
Why is diffusing needed?
Contemporary LED light sources are actually arrays of single LED spots. Some offer changing the color temperature – often they internally use blue and yellow LEDs, the latter actually emitting mixed red and green light. Because these LEDs spots usually are packed with some space between them, and the LED’s emit light in a certain angle, under circumstances their outline can be seen on the illuminated area – to be exact: on our negative. This is why the emitted light needs to be diffused.
Classic diffusing materials
Classic diffusers are made of frosted glass or PMMA, such as Plexiglas, well known in light advertising and outdoor advertising. Both materials have in common that their surface is roughened and that it absorbs and (to a lesser degree) reflects a good half of the light emitted by the light source. Here are typical transmission values for common Plexiglas variants (thickness 3mm) for LED and backlighting techniques:
| Plexiglas LED white WH14 GT | glossy-coated | 47 % transmission |
|---|---|---|
| Plexiglas LED white WH52 GT | glossy-coated | 44 % transmission |
| Plexiglas LED white WH46 SC | one side satin-coated | 40 % transmission |
| Plexiglas LED 0M 200 SC | one side satin-coated | 72 % transmission |
Plexiglas 0M 200 SC
The above list shows that the WH Plexiglas variants absorb or reflect more than 50% of the light, in photographic terms more than one stop. There is, however, one new specialized sort called Plexiglas 0M 200 SC (“Zero M two hundred SC”) which is advertised as being developed especially for LED backlighting as well as providing an enormous 72% transmission value. In photographic terms, Plexiglas 0M 200 SC only causes 0.5 stops of loss!
What does this mean in practice?
So, if your light source alone is powerful enough to give you a 1⁄250 sec shutter speed, normal diffusers will decrease the shutter speed to 1⁄125 sec and even slower, while the new Plexiglas 0M 200 SC will give you 1⁄180 sec.
How to buy Plexiglas 0M 200 SC
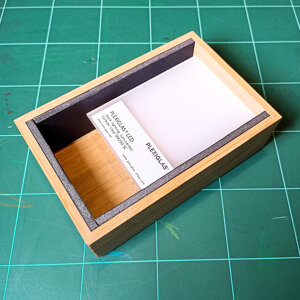
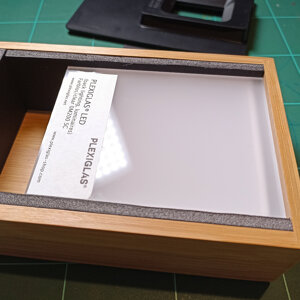
Darmstadt-based Plexiglas manufacturer Röhm runs a webshop which offers custom cuts from 200 ×100 mm onwards (ca. 11 € excl. shipping), so you may want to ask a local glazier or advertising technician if they cut it in smaller pieces. – Röhm/Plexiglas do, however, offer product samples for small money. The product sample I got measures exactly 100×75 mm and perfectly matches our box and light source.
Light chamber: Foam boards
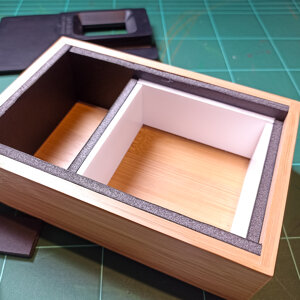
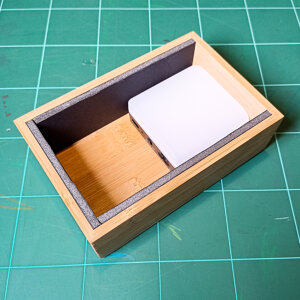
The foamboard is used to build a light chamber for the light source. The light source measures 68 × 68 × 18 mm while the inner dimensions of the wooden box is 138 × 88 × 43 mm. Key measure here is the boxes 88 mm (inner short side) so we have to distribute 20 mm of space. I had foamboard in two widths, 5mm, and 3mm (8mm in sum if piled up). Now, if the light chamber walls are 2 × 8 mm, the light source has an airy 2 mm of space to each side. So your shop list is:
- Kapa foamboard, black, 5mm, 200 × 140 mm (DIN A5) · Ebay
- Kapa foamboard, white or black, 3mm, 200 × 140 mm (DIN A5) · Ebay
- Optional: some aluminum foil
The walls of the light chamber should reflect the light; thus the inner layer of 3mm formboard should be white. Optionally, you can line the inside of the box with aluminum foil — in this case, the foamboard does not have to be white; black is also perfectly OK and also looks more uniform.
Cutting list: Foamboard black, 5mm
| Pieces | Width | Height |
|---|---|---|
| 2 × | 133 mm | 43 mm |
| 1 × | 88 mm | 43 mm |
| 2 × | 78 mm | 35 mm |
Cutting list: Foamboard white, 3mm:
| Pieces | Width | Height |
|---|---|---|
| 2 × | 80 mm | 35 mm |
| 2 × | 71 mm | 35 mm |
Light chamber construction
The below gallery gives you an idea how to put the foamboard pieces together. Note that the inner light chamber pieces are 35 mm high. The remaining 8 mm to the upper edge will be filled by the 3 mm diffuser plate and the 4 mm feet of the Valoi holder.
